Category Archive: Tutorial

2018
02/24

Category:
farming
quilts
sheep
Tutorial

COMMENTS:
Comments Closed

Delectable mountain tutorial

I’m not sure if this is more for me or you.  The delectable mountain tutorial  was a dry run before I actually cut out my pieces for the quilt.

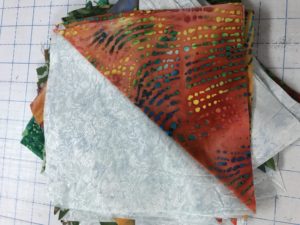
I started with 8 1/2″ squares cut on the diagonal.  In this case I used the same fabric for the light color in each of my blocks.  Sew them together and 
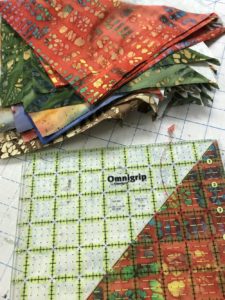
square them up.   This I found to be the most crucial step, because somehow when I sewed those large triangles, they didn’t always come out square.  So I squared to 8″.  (the rest of these photos is using my practice piece)
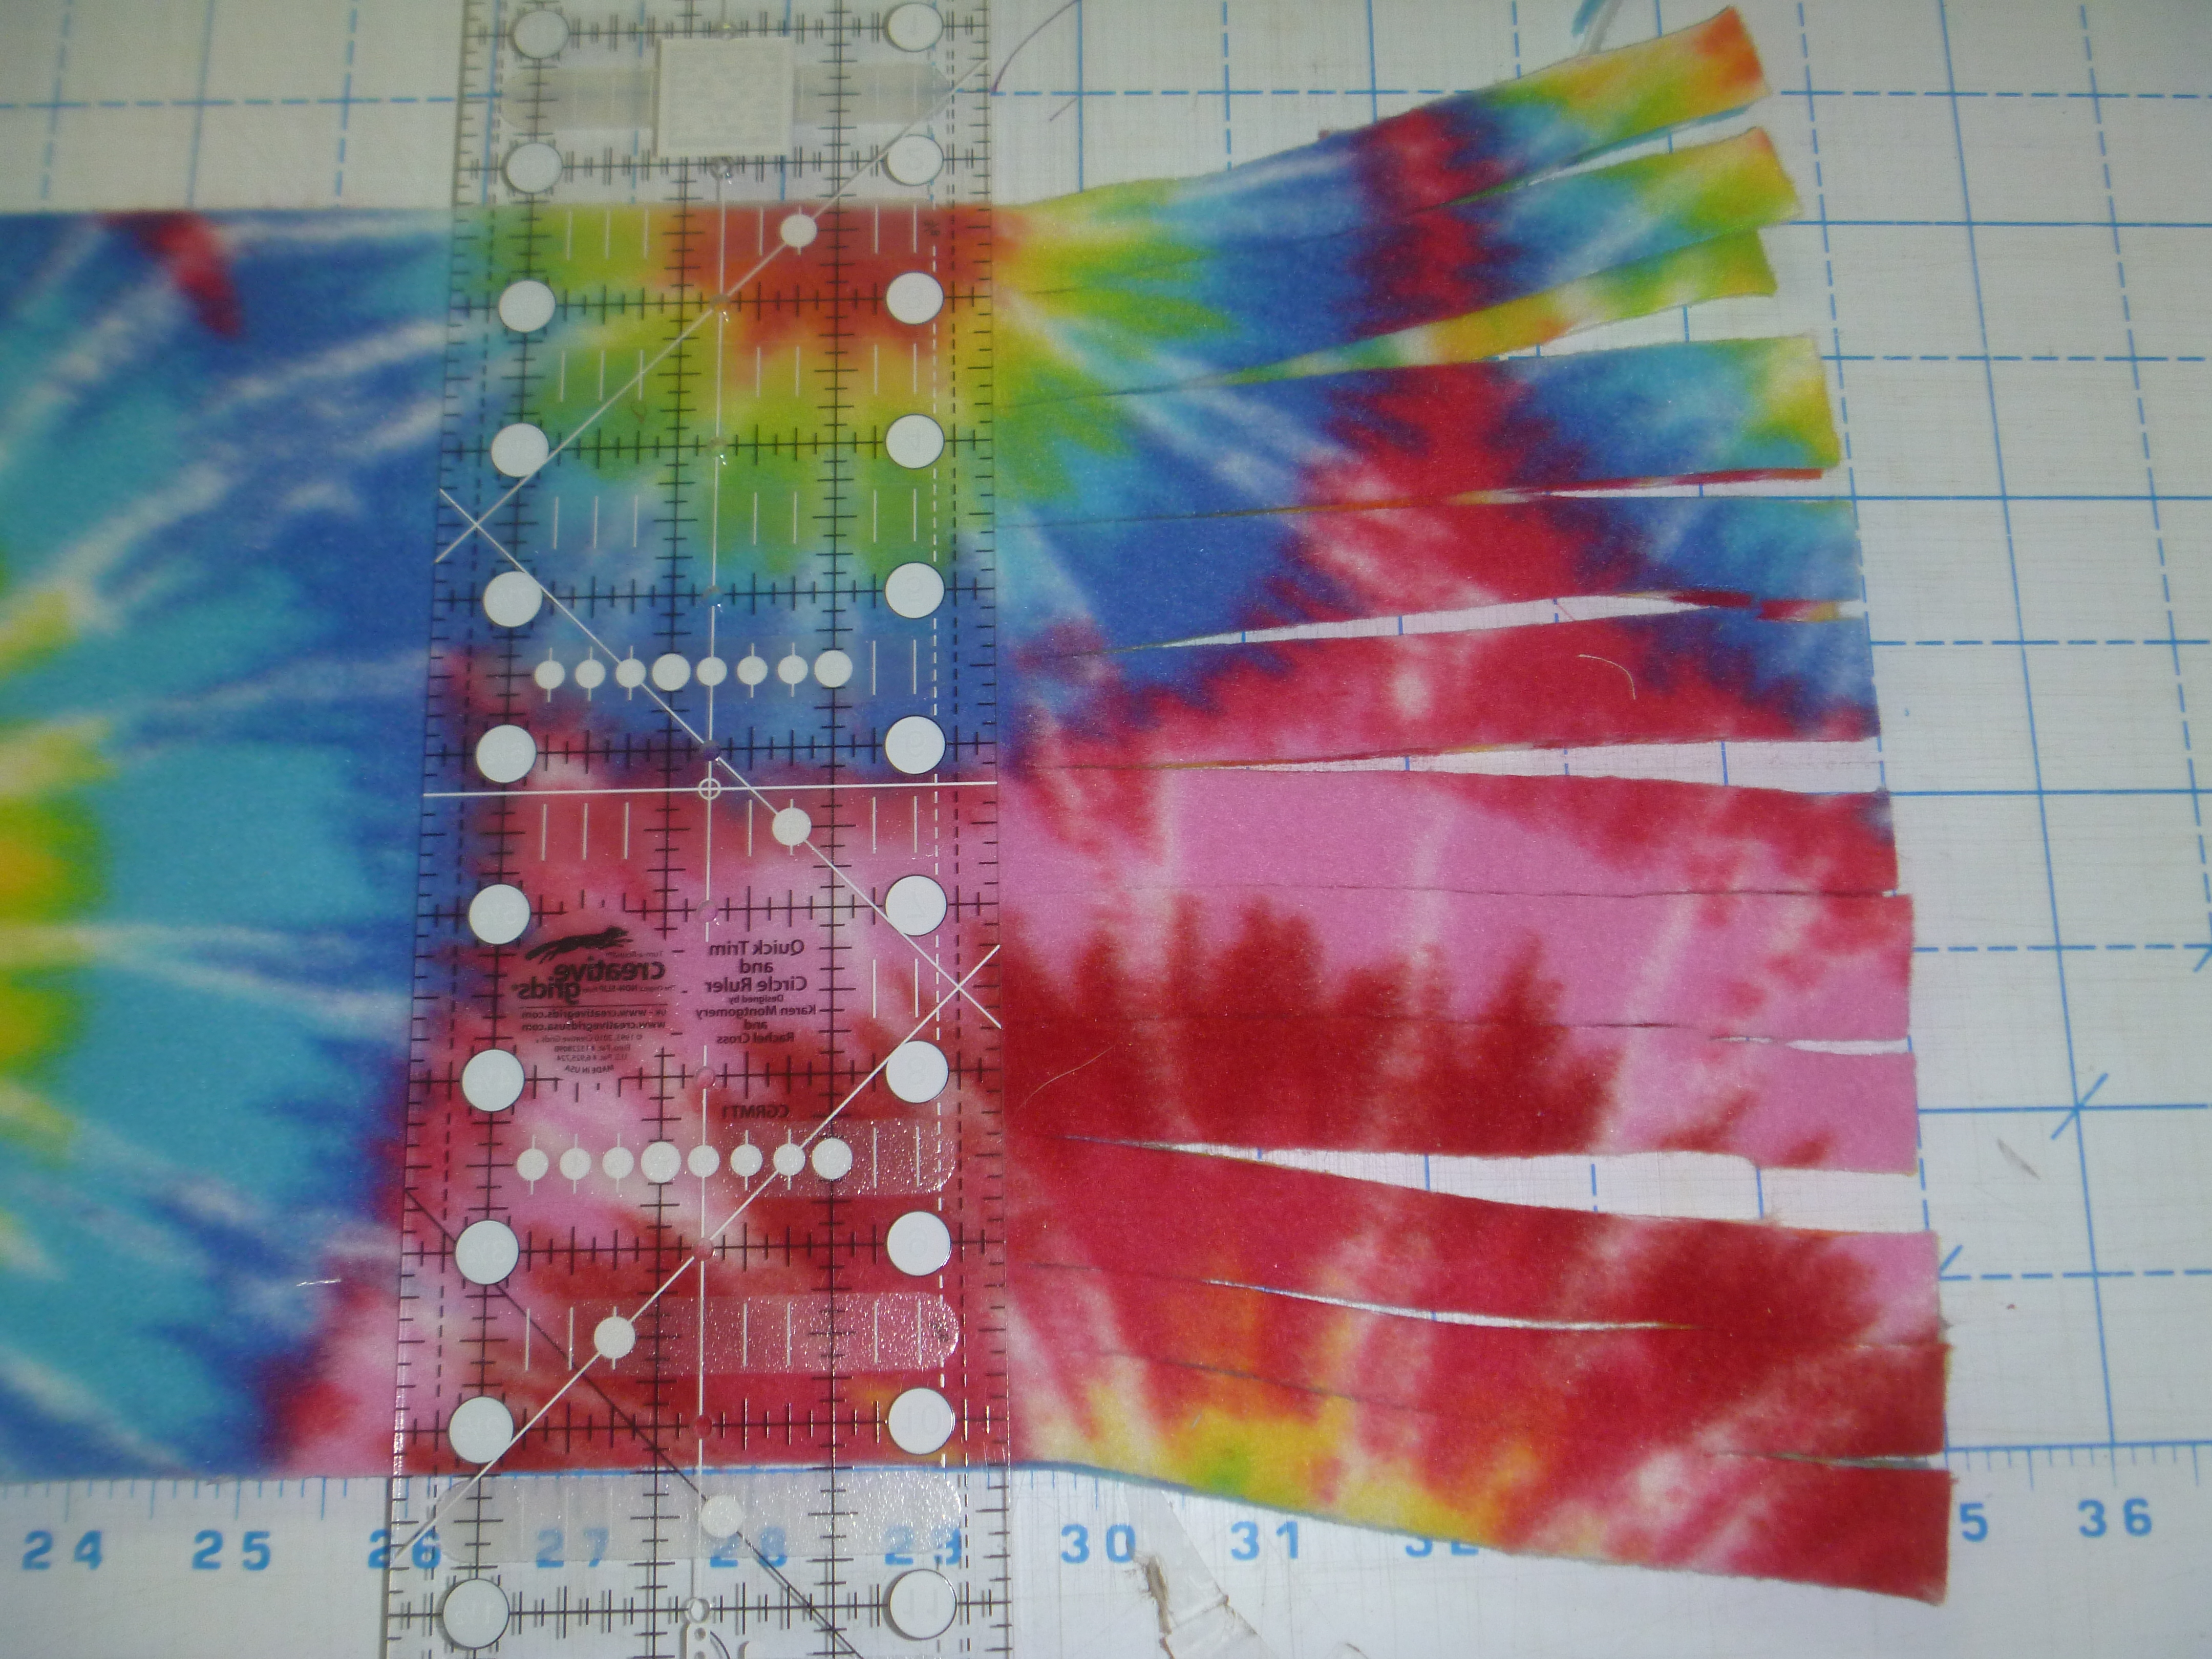
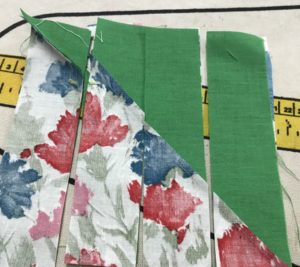
I put 2 of these new squares together with sides reversed and matching the diagonal line, then cut the 8″ pieces into 4 -2″ pieces and 
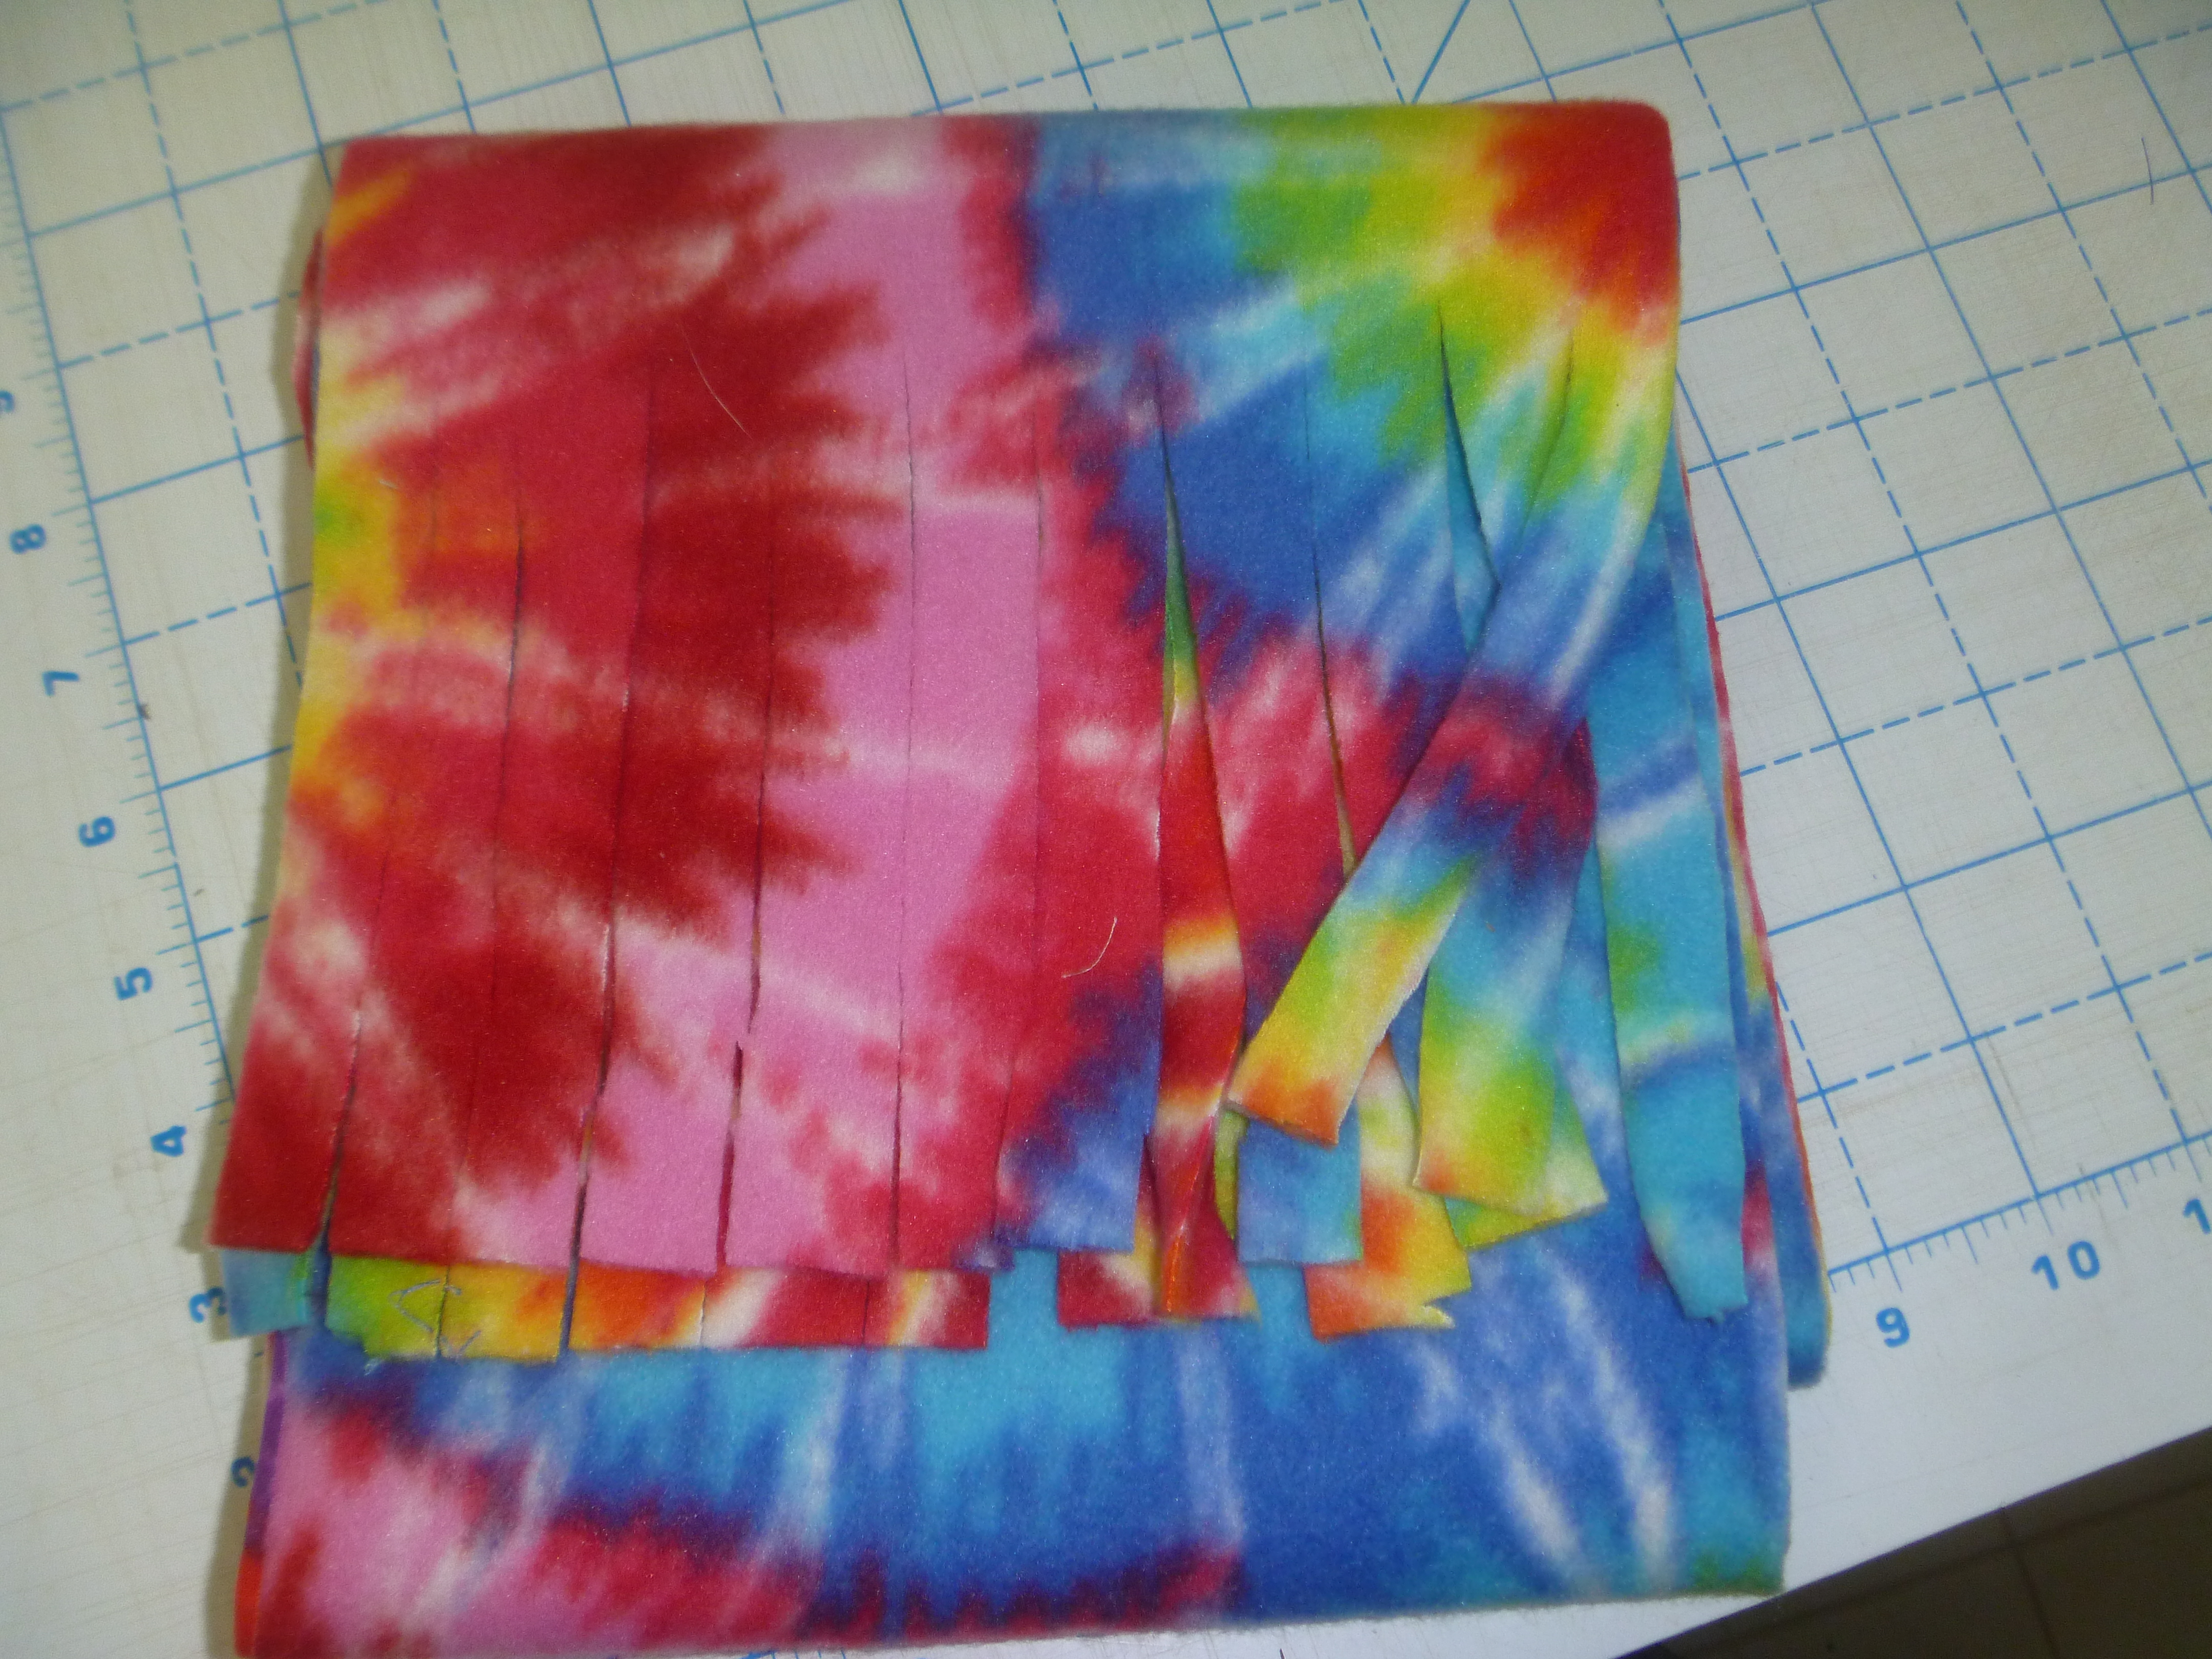
switched the two outside pieces and then the two inside pieces so they now look like this.   Because you have cut two of these squares, one is the reverse of the other and can be put together like this
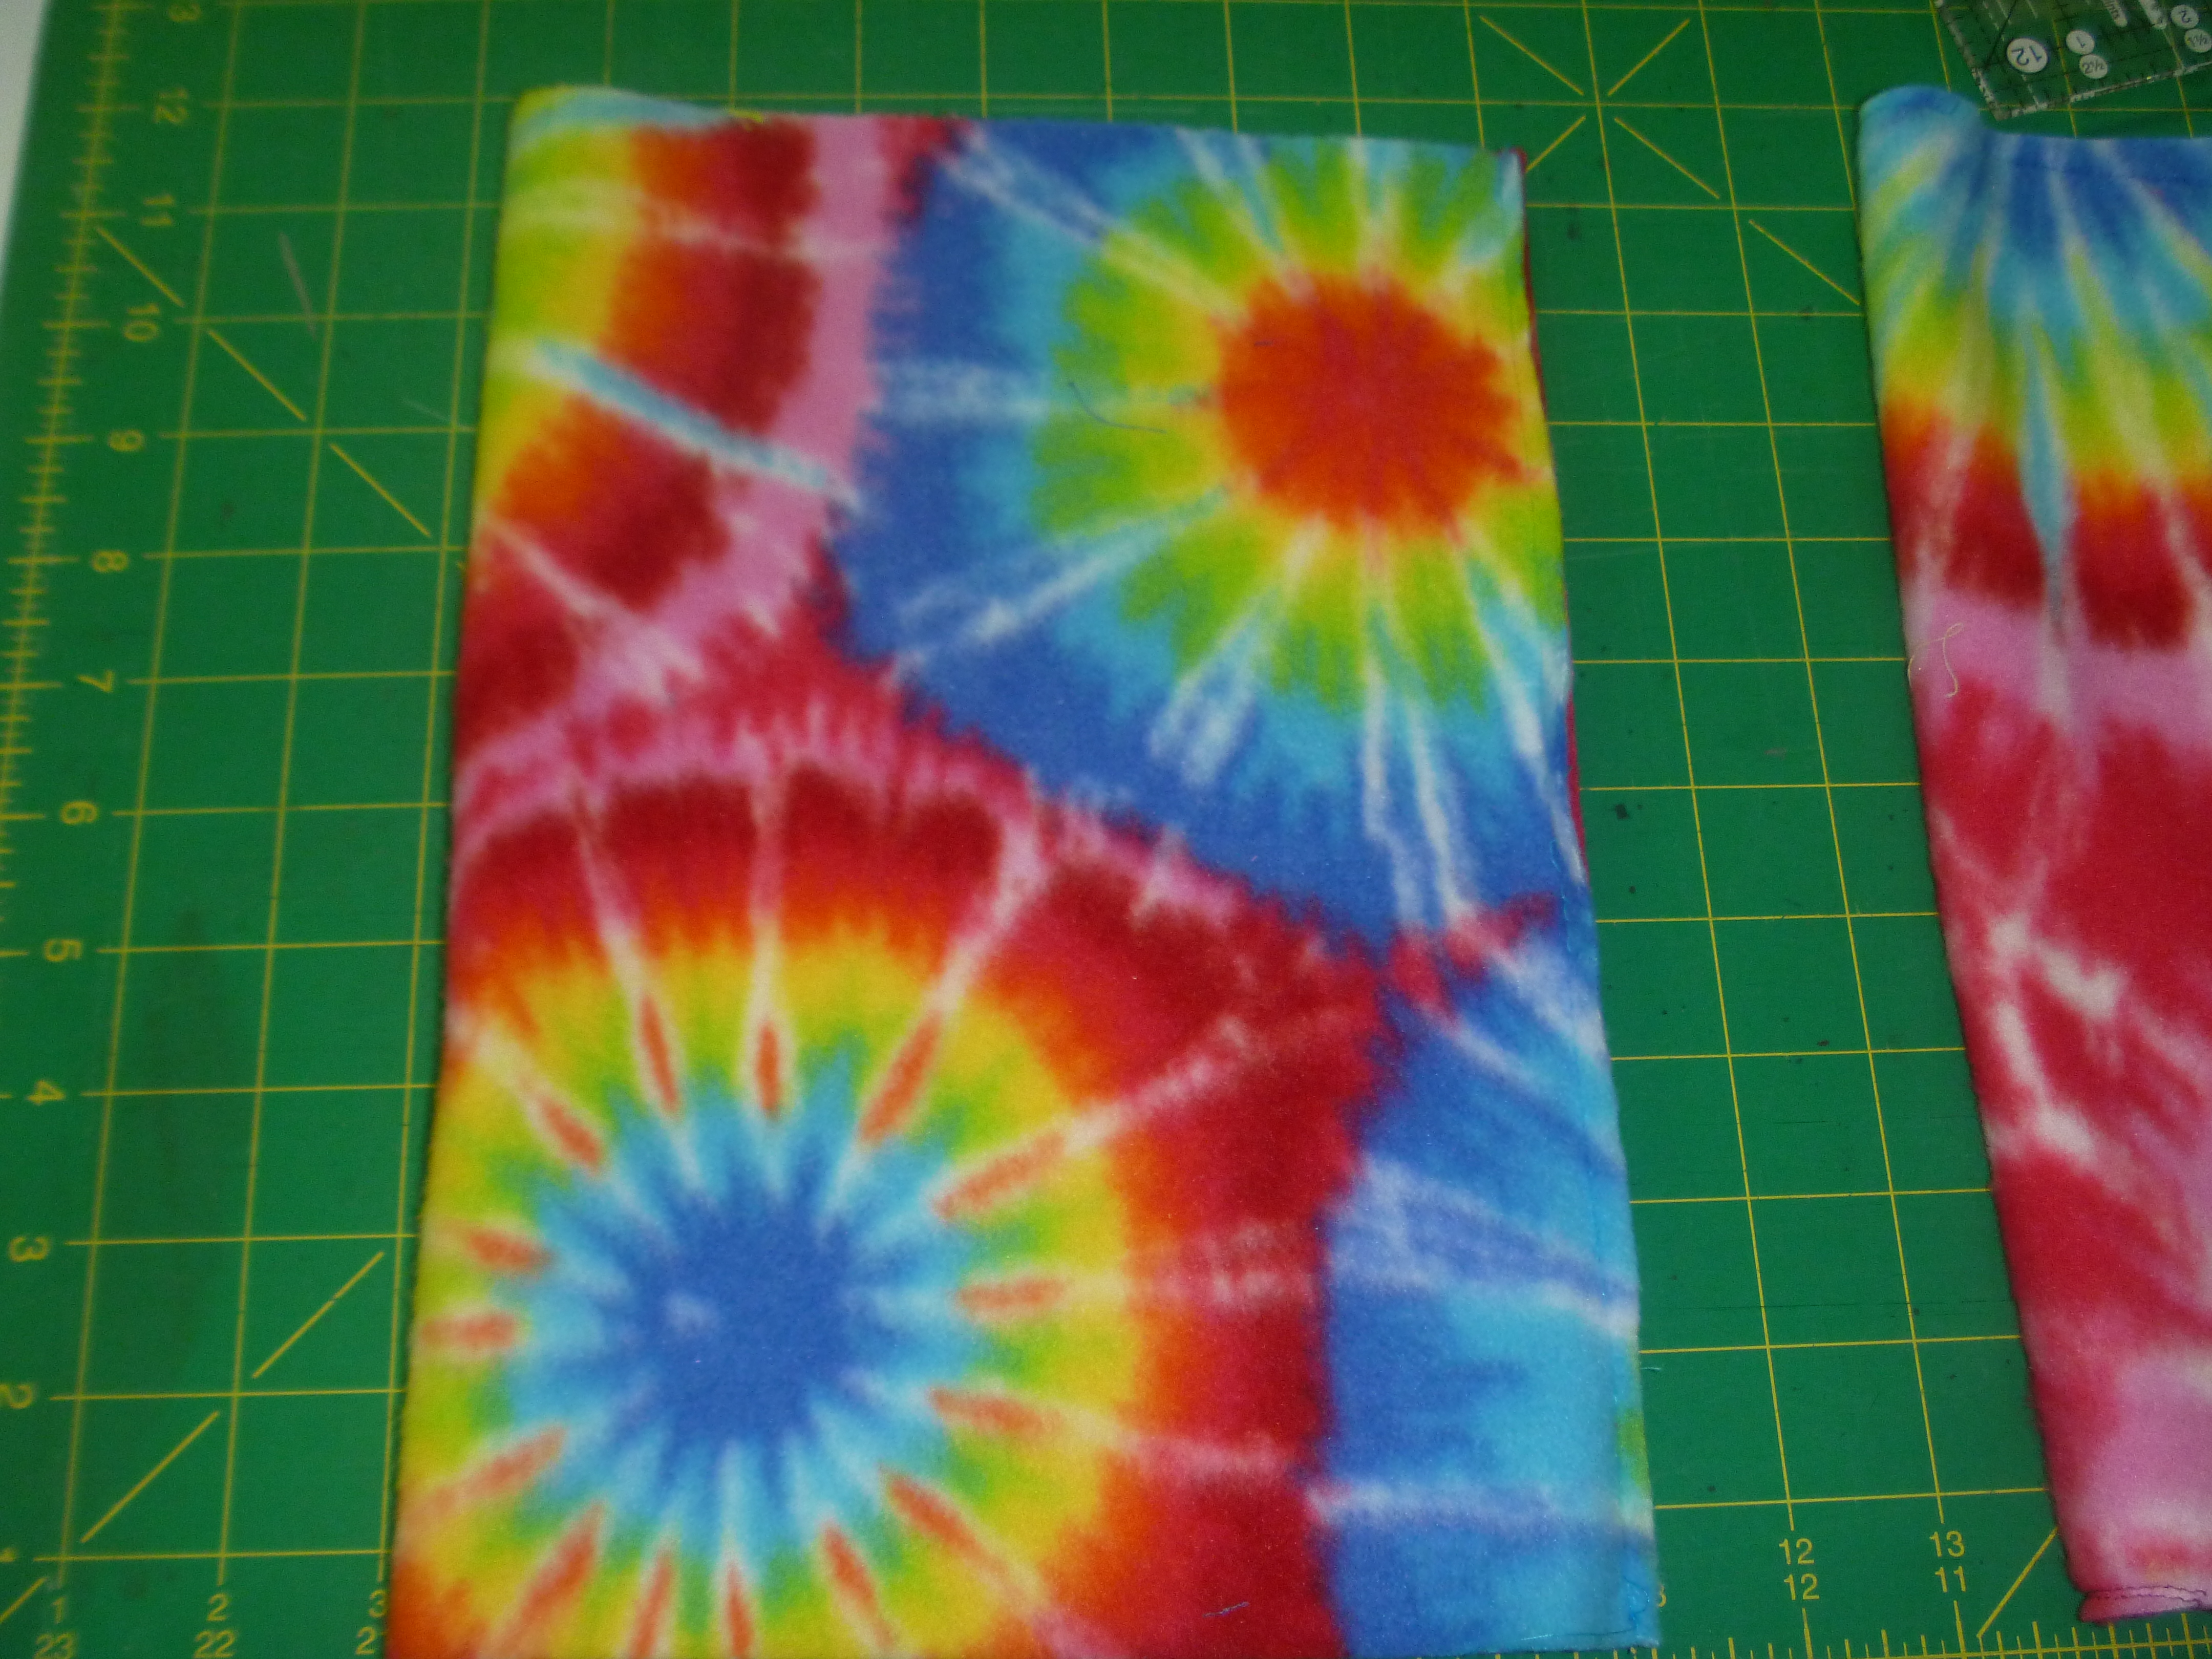
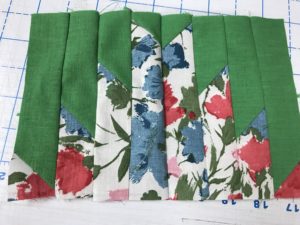
to complete your mountain.  If you have trouble visualizing this, you might want to make two squares and try it out first.   It makes more sense once you have done it.

NEWS ITEM:   Meet Paco and Pepita, our latest additions

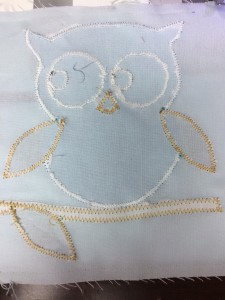
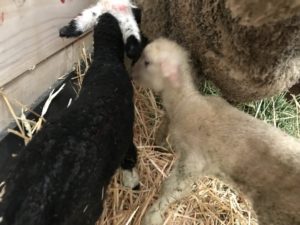
She is white, but she is fresh and not yet dried in this photo.

2016
01/24

Category:
quilts
Tutorial

COMMENTS:
Comments Closed

Owl tutorial

IMG_3888

I thought you might enjoy learning from what I did with the owls.   I used a GO die.   First I ironed onto each of the pieces Steam a seam.   But you could starch heavily or use another product that is sticky on both sides.    I cut three of the owl pieces,  three white eyes, and three black eyes at the same time.  I knew that I wanted 12 owls, so that was what I cut out.   The instructions that come with the owl die is for a pillow and they put the owl on a 6 x 6.5 piece of fabric.  So that’s what I did.  However, I feel the owl looks squeezed into too small a space, so I would probably try an 8″ square.

IMG_3895

We put the owls in the color order we wanted them, then proceeded to make the pupils, wings, leaves (we used the wing pattern for leaves)   different so no two were alike sitting side by side or up and down.  Narrow double fold bias tape remnants were used for branches.  I numbered the owls on the back of the owl so I could sew like colors at the same time.IMG_3894

Next I put tear away stabilizer on the back side as I sewed the white eyes and then the black eyes using a zigzag with 2.5 width and 1.0 length on the machine.  You can change this.  I am making this for a small child who will undoubtedly drag this around and I want the applique secure.  This is a great place to use those partial bobbins because they won’t be seen. (This is not a display piece and with matching thread on the front, you won’t notice the eyes aren’t exactly a perfect circle – this is a child’s fun quilt)

IMG_3893

You can see at the top of this owl, I’m a bit on the inside of the applique.   It is better if you are totally on the applique piece than that you might be half on and half on, because this quilt will see the washing machine frequently.IMG_3896

The tear away is now there for the rest of the sewing and you won’t have puckering.   From here on, I put on a thread color and did all pieces with that color, then changed color and repeated until all the pieces were secure.   When finished,  I took off as much of the tear away as I reasonably could and saved any of the tear away large enough to back a leaf, because there will be a lot of leaves on the brown tree trunk.  I could have put different borders around each owl to make the block larger and omitted the tree, but chose instead to use width of fabric in tree color for the length of this small quilt.  The width will be about 36 which make it a perfect size for a little one.

If I were doing a pillow, wall hanging, or something that wouldn’t see the wash that much, I would probably take my machine numbers to 1.5 -2 width and maybe a .3 zigzag.   You might want to play with that.

 If you don’t have a GO and aren’t getting one soon, this quilt is simple enough you could make cardboard patterns and still have the fun of making it.

I’m hoping you will enjoy making a few owls for yourself or a special little  one.


2014
05/29

Category:
Life
Sewing
Tutorial

COMMENTS:
Comments Closed

Quick fleece gift tutorial – scarf, blanket, hats

The Bible says, “the poor you have with you always”     I take this as a call to service.   For me summer is a great time to start on my charity gifts.   By the time cold weather arrives, I usually have an arsenal of small gifts, none of which took me much time.   I also have blankets and quilts, but they take a bit longer.

SCARF  (fleece blankets can be done the same except use 2 yards and just trim the margins off the sides and use a plate to make round corners.

Yesterday’s blanket backing was fleece and left me with scraps.    Buy a 1/4 yard  of fleece in colors for the recipient.   I suggest the dark or team colors for men.   This does not need to be prewashed as it does not shrink.

P1010605

Since the piece was 66″ long and 8+ inches wide on each side, I cut those sides off.

P1010606

Then trimmed them to be 8″

P1010607

Then fringed each end by laying a ruler across the end where I want the fringe to stop and cutting every 1/2″ up to that point.  I do not measure, just eyeball it.  (If the fringed pieces are pulled they will curl).   The fringe is optional.

P1010608

With little time and money you have a quick gift or charity project.   We make these for street people along with fleece hats and in purple for the hospital “shaking babies” program.

P1010610

 HATS

Average Head Sizes from Martha Stewart

Newborn (6 months and younger)   Circumference: 14 to 17 inches Crown: 8 to 10 inches

Infant (6 to 12 months)    Circumference: 16 to 19 inches Crown: 11 to 12 inches

Child (12 months to 3 years)    Circumference: 18 to 20 inches Crown: 11 to 12 inches

Child (3 years and older)   Circumference: 20 to 22 inches Crown: 13 to 14 inches

Adult Woman   Circumference: 21 to 23 1/2 inches Crown: 13 to 15 inches

Adult Man    Circumference: 22 to 24 1/2 inches Crown: 14 to 16 inches

 Using the infant size above I cut 2 hats with the 11 x 16″ measurements

P1010611

Then sewed the long sides together with a 1/4″ seam to make a tube.

P1010612

Sew a seam across the top of the hat

Sew the two points together using a strong thread (for a beginner, this is better done with a needle and thread)

P1010613

Bare heads lose a lot of body heat, so I have not stitched the bottom of the hat.   One can turn it up once or twice or even leave it full length.   For a child, it can be used for a longer time.

P1010614

Today, we have put away 2 scarves and 2 hats for gifts.

P1010615

And because we paid for all the scraps, I want to use them.   So using a bit of satin binding left over from another project and the last usable piece of this fleece, which is 10 x 11.5, I sewed the binding on for the baby to take along when they leave the house (esp in case she is a thumb sucker).   In this way, mom can pin the piece to baby’s clothes and baby has her comfort piece.

P1010616 baby blanket scraps

In case you are concerned about the selvages cut off,   they will become plant ties.

2014
01/24

Category:
Sewing
Tutorial

COMMENTS:
1 Comment »

Sweatshirt to jacket basic tutorial

P1000632 afternoon sunThe sun was attempting to come through the fog as I sit down to write this.   The shadows are rather interesting.

REMODEL: supplies needed:   a sweatshirt and 1″ matching grograin ribbon twice the length of the front of the shirt

P1000628 price tag

 P1000630 grograin ribbon


This is a very basic sweatshirt remodel.   I often wear an open sweatshirt as a jacket and when I find them a pullover like this for $3.oo,  I am sure to buy some.

P1000622 finding center frontThe first thing to do is find the center front.   Pin the shoulders together and then the bottom side seam.   Make sure the underarm seams match as well.   Take and fold it so the center front is nearest you and pin up the front.

P1000623 marking cf with pins

Open the shirt  and draw a chalk line using a ruler between the pins,  after the pins are removed, connect the line.P1000625 cf cjhalk line

At the sewing machine, sew about 1/8th inch down each side of the line.   This is your cutting line and the stitching reinforces the shirt so it doesn’t ravel.   P1000629 cutting openPut something between the front and back of the shirt so it doesn’t accidentally get cut all the way through.   Cut through the chalk line.P1000633 dbl check ribbonMeasure the grograin ribbon leaving a half an inch both top and bottom to turn under.   P1000635 starting the endSew the grograin ribbon to the front side of the shirt with a 1/4″ seam.  Turn the top 1/2″ and the bottom 1/2″ up toward you so it will be inside when you turn the ribbon Do this to both sides.   You may need stiletto or orange stick to get it started as it is rather thick.P1000639 extra tab

P1000642 sewing the ribbon 2


Turn this to the inside of the shirt.  Roll the shirt under so the shirt fabric is on the roll.   From the back side, sew 1/4″ from the open side of the ribbon, top to bottom.

P1000645 finished front.

Now you have a very plain jacket and another time we will go into how you might want to decorate it with embroidery, applique, lace, ribbons, different necklines, etc.  There are Just so many ways to have fun with this shirt.   You can many and they will all look different.

Have fun playing with different ideas.